How to mail merge a PDF
Mail merge is a method used to quickly create multiple documents for mass mailing. The pdfMachine Merge product performs email merges.
pdfMachine merge is mail merge software installed on your PC that sends batches of personalized emails with personalized PDF attachments. Word, PowerPoint, Excel or HTML templates. Highly configurable. See how to here. pdfMachine merge will import most Word mail merge documents and convert them to pdfMachine merge format.
pdfMachine Word mail merge (deprecated)
pdfMachine Word mail merge is now deprecated. The pdfMachine merge product should be purchased instead. Instructions are still here for users with old licenses.
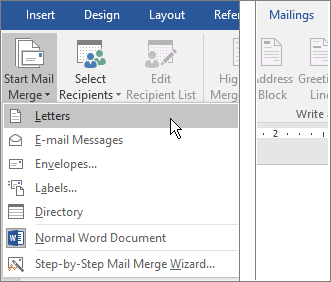
Step 1. Use the Word Mail Merge Wizard to create a mail merge Word document (or open an existing one).
Use the Mail Merge Wizard from the Microsoft Word 'Mailings' tab to set up your mail merge document.
There are many explanations on the web and in the Microsoft Word help on how to create a mail merge document. Microsoft have plenty of information on how to set up the mail merge document here: http://office.microsoft.com/en-us/word-help/word-mail-merge-a-walk-through-the-process-HA001034920.aspx
Step 2. Set up a mailing list with the individual information for each email/document.
Set up a mailing list to be the data source to the mail merge operation. It must contains rows (or records) of information that will be pulled in to personalize the email and PDF during the merge. The column name or record name will be the merge field name.
The merge field names must contain only alphanumeric characters and the field names must not start with (0-9). The maximum number of characters in the field names, including spaces, is 40.
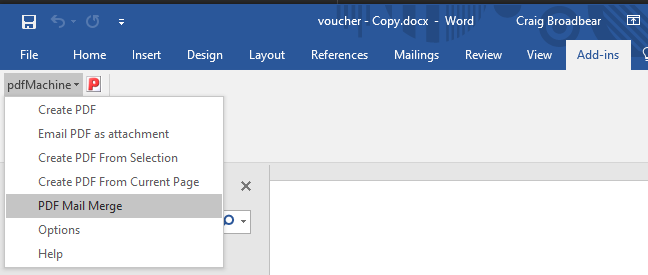
Step 3. Select PDF Mail Merge from the pdfMachine Word add-in
From the Word Add-ins tab, select the pdfMachine drop down menu and choose PDF Mail Merge
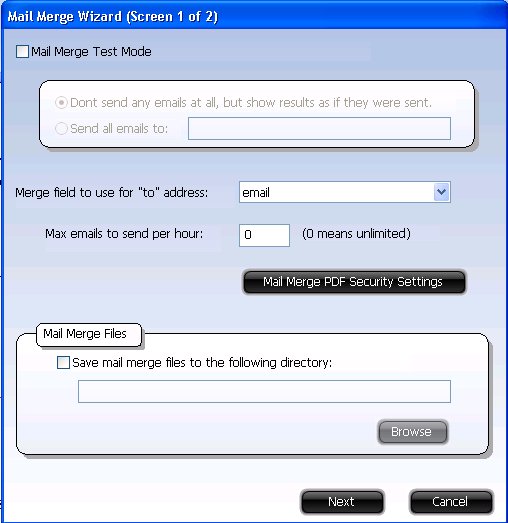
Step 4. Choose to Test or Send the Mail Merge
Mail Merge Test Mode
If ticked, test mode is enabled. There are two types of test mode:
* Dont send any emails, just generate the PDF files. CC and BCC entries will also be ignored.
* Send all emails to one particular address, overwriting the email address in the merge data.
It is strongly recommended users do a test to make sure everything is as expected before doing a "real" merge.
Merge Field to use for "to" address
pdfMachine has to know where to get the destination or "to" email address from for each email sent. Select the name of the merge source data field that represents the "to" address.
Step 5. Set up the email content and any PDF security
Use the pdfMachine Mail Merge Wizard (licensed with pdfMachine ultimate) to specify the email settings and any PDF security settings. The following dialog will pop up.
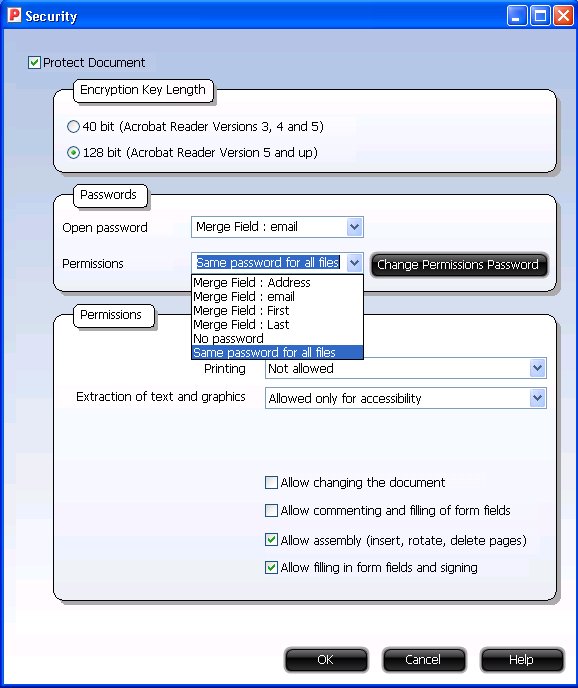
Mail Merge PDF Security Settings
This button invokes the following dialog. It allows for unique passwords to be set for each PDF. The passwords can be taken from the contents of merge fields or the same password can be set for each PDF. A typical use would be to encrypt the PDF with an open password based on a merge field (e.g. account_number) and hard code a permissions password.
Step 6. Choose whether to save the PDF files as well as send the emails
Save mail merge files
If enabled the Word and PDF files are saved. If emails are not selected to be sent this can be used to examine the PDF contents. If emails are sent then this saves a copy of the documents as well. If a directory is specified then the merge Word documents and resulting PDFs are saved to this directory. If a directory is not specified then a temporary directory is used and the files are removed after the process is complete.
Step 7 - Email Settings, Customization & Personalization of CC, BCC, Body, Subject, PDF attach from merge data
This is the last configuration window before the merge begins. It is possible to embed values from the merge records in the text or html email. To do so, surround the field name with curly braces.
e.g. {address} or {firstname}
The name must match exactly the merge field name. Where there is a space in the merge field name you need to put an underscore in, for example a merge field of "First Name" should be referred to as {First_Name}.
This will work for the CC, BCC, Subject and PDF attach fields as well.
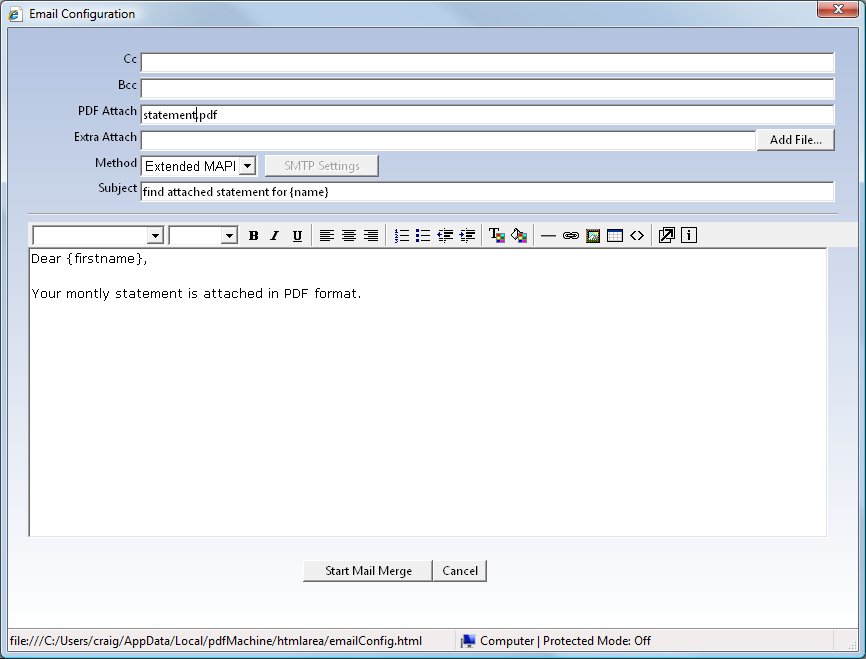
CC
The "Carbon Copy" field to be used in the emails.
BCC
The "Blind Carbon Copy" field to be used in the emails.
PDF Attach
The name the attached PDF file will have.
Extra Attach
Any other files you wish to attach to the emails can be setup here.
Method
Email send method to use. Each method has its pros and cons and whats best for you will depend upon your
environment.
Extended MAPI
If you have Microsoft Outlook installed, the best method to use will be Extended MAPI, as it will allow HTML
emails and will not prompt you.
SMTP
This also works well, but is harder to configure and you need an SMTP server somewhere.
Simple MAPI
Does not work well with Microsoft Outlook, but may work well with other email clients. Simple MAPI does
not support HTML emails.
Outlook
This method (not Outlook express) works well on early versions of Outlook, however modern versions of Outlook display
annoying security dialogs that need to be acknowledged for each email sent.
Step 8 - Start the Merge!
Click the "Start Mail Merge" button to begin the merge.
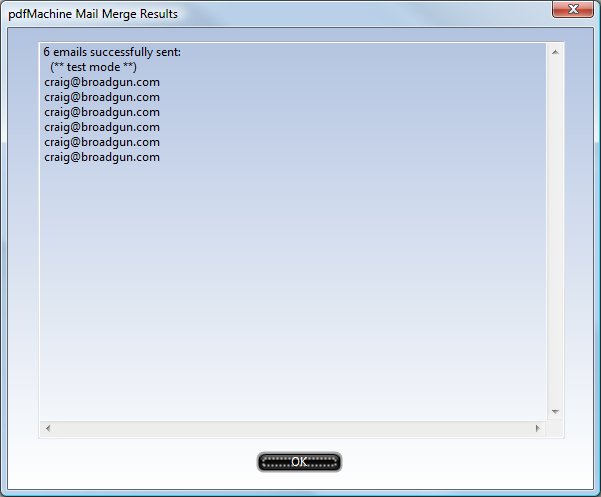
Step 9 - Review the results
It may take a while to send all your emails, but when finished you will see the results dialog.
In summary
How to send emails using Word mail merge with PDF attachments
Step by Step Directions
Use the Word Mail Merge Wizard to create or open a mail merge Word document.
Set up a mailing list with the individual information for each email/document.
Start the pdfMachine mail merge Wizard from the Word addin tab
Set up the email details, the to address, the content and select the method eg Outlook, SMTP or a MAPI client
Test or Send the Mail Merge
Review the results
How to send emails using Word mail merge with password protected PDF attachments
Step by Step Directions
- Use the Word Mail Merge Wizard to create or open a mail merge Word document.
- Set up a mailing list with the individual information for each email/document.
- Start the pdfMachine mail merge Wizard from the Word addin tab.
- Set up the email details, the to address, the content and select the method eg Outlook, SMTP or a MAPI client.
- Enable Permissions and set either a personalized password by using a merge field or a common password for all documents.
- Test or Send the Mail Merge.
- Review the results.
Requirements
Windows 7 / 8 / 10 / 2008 / 2012 / 2016, includes x64 Platforms
Microsoft Office 2013 /2016, 365
pdfMachine ultimate 15.80 : Download here
An email account which can send using one of Outlook, SMTP or a Mapi clients.
This feature is deprecated. New users should purchase pdfMachine Merge